


- Fact Checked
- August 22, 2025
- 13 min read
What Does a Vaginal Swab Test For? A Complete Guide

- Written by Daniella Levy • Updated on June 04, 2026
- Updated on June 04, 2026

Table of Contents
Table of Contents
Whether you're checking for STIs, investigating unusual discharge, or doing a microbiome screen, a vaginal swab is a routine, low-key way to gather answers. Whether done by a healthcare provider or through a self-collect kit at home, swabbing can feel a little awkward, but knowing what to expect makes all the difference.
This post is for informational purposes only and does not constitute medical advice. See full disclaimer below.
What Is a Vaginal Swab?

A vaginal swab is a sterile tool used to collect cells and fluids from the walls of the vagina. It typically has a soft tip attached to a plastic swab shaft.
Vaginal swab samples are sent off to labs to test for:
- Chlamydia and other sexually transmitted infections (STIs)1
- HPV2
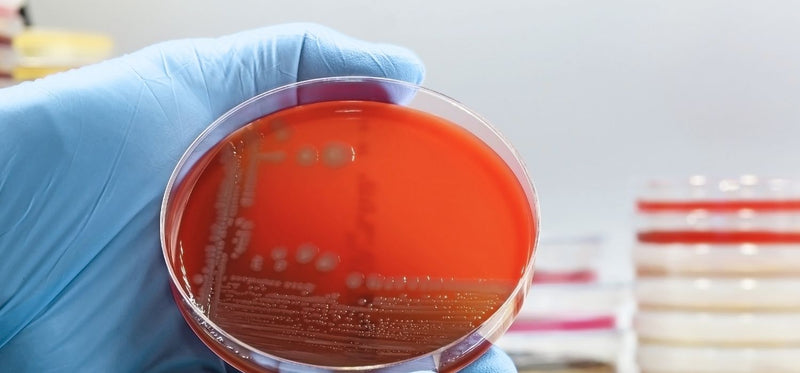
- Causes of abnormal vaginal discharge, like bacterial vaginosis (BV) or yeast infections
- Vaginal microbiome status3
Why Would You Need a Vaginal Swab?

Your care provider may recommend a vaginal swab for several reasons, or you may choose to self-screen.
Swabs are used to help detect:
- Chlamydia, HPV, or other sexually transmitted infections (STIs)
- Causes of abnormal vaginal discharge, odor, or irritation
- Changes in vaginal pH or microbiome4
- Recurrence of symptoms after treatment5
You might also use a test kit as part of fertility care or general wellness tracking.
Who Can Perform a Vaginal Swab And How to Decide
Most people can safely self-collect a vaginal swab specimen from the comfort of home using a well-instructed collection kit6, and for many, it’s an empowering, private, and flexible option. However, self-collection isn’t ideal for everyone, and that’s perfectly okay.
Self-collection may be right for you if you:
- Are comfortable following the instructions exactly as written
- Don't have symptoms of a serious infection7
- Want privacy when collecting your sample
- Are not pregnant
If you are pregnant or even suspect you might be, please let your provider know before performing a vaginal swab at home. Some at-home kits are not recommended for pregnant women. Your provider might also just prefer to do the test in the office for safety reasons.
Also check in with your healthcare provider before performing a swab test at home if you have:
- Pelvic pain, especially if it's new or ongoing
- Pain during sex
- Unusual vaginal discharge that's yellow, green, or has a strong or unpleasant odor
- A history of pelvic inflammatory disease (PID)
- Any condition that makes vaginal insertion uncomfortable
- Past trauma, anxiety, or discomfort with self-testing8
- Mobility or vision challenges
- Uncertainty about how to perform the test correctly
And if, for whatever reason, you simply prefer your provider to perform the test for you, that's totally okay. That's what they're there for!
What to Expect at the Doctor’s Office
Whether it's your first time or your fiftieth, getting a vaginal swab from a healthcare provider is quick, straightforward, and typically over in just a few minutes. Here’s what the process typically looks like.
1. The Setup
You’ll undress from the waist down and get into a comfortable position on the exam table—typically lying back with knees bent. Your care provider will explain the process and ensure privacy and respect.
2. The Swab
After opening the swab package, the provider will gently separate the labia and insert the soft tip just past the vaginal opening. They’ll rotate the swab tip against the walls of the vagina, collecting visible vaginal discharge and other sample material.
The end of the swab may be angled slightly for optimal collection. Once finished, the top portion of the swab shaft is broken off, and the swab tip is placed into a sterile transport tube.
3. Handling the Sample
The provider will seal the transport tube, label it, and ensure it's delivered to the lab under appropriate temperature and time constraints—especially if processed using systems like Hologic. Used gloves and packaging are disposed of via regulated medical waste procedures.
What to Expect with a Self-Collect Vaginal Swab

Many people prefer self-collection for its privacy, flexibility, and convenience. With clear instructions and a bit of planning, collecting a valid vaginal swab sample at home is completely manageable—even if it’s your first time.
Here’s what to expect from start to finish, plus expert tips to keep your sample secure, private, and valid until it reaches the lab.
1. Prepare
Before you even begin the test, you need to do some things to ensure a clean sample. The first? Wash those hands!
After that, read all the instructions. Even if you've done a home collection before, every kit has slightly different details, especially when it comes to storing and mailing.
Finally, get into a comfortable position (many women prefer lying back or standing with one foot propped up) and open the swab package, avoiding contact with the soft tip.
2. Collect the Sample
Now it's time to actually take the vaginal swab. You only need to insert the tip about 2 inches into the vaginal opening. Once inside, rotate it against the vaginal wall for 10-30 seconds.
Then, take it out and insert the tip into whatever sort of transport tube has been provided. Make sure the tube is sealed tight.
Important note: Only use the swab and the transport tube included in your test kit. Don't mix and match from other kits. This can lead to an invalid result.
3. Store the Sample Before Mailing
If you can't mail your sample right away, it's important to keep the transport tube in a cool, dry place, away from direct sunlight, heat sources, or vehicles (aka don't leave it in your car). This will help prevent bacteria to multiply or DNA to degrade, which can incorrectly skew test results.
Some kits may have special storage requirements910, like refrigeration or shorter mailing windows. That's why it's so important to read your kit's exact instructions. Do not freeze your kit unless the directions say to.
If you have any questions, take a picture of your kit's instructions and get clarification from your doctor's office.
4. Seal, Package, and Mail Your Sample
When you're ready to mail, place the sealed transport tube into the biohazard bag included in your kit. Put this into the return box or prepaid envelope included in the kit and include any required forms (your test won't be processed without them!).
Some Mailing Tips for More Accurate Results:
- Avoid mailing your sample on Fridays or right before long weekends to prevent your sample from sitting in transit for too long.
- If you live in a remote area or anticipate postal delays, contact your kit provider about alternative drop-off locations or courier options.
- If you can't mail your sample within the recommended timeframe, reach out to your provider for advice. Delayed mailing can affect sample quality and may result in an invalid result.
- Your return package is designed for privacy and security. Labels are discreet, and the biohazard bag prevents leakage or contamination.
5. Eco-Friendly Disposal Tips
Once you’ve mailed your sample, here’s how to responsibly dispose of the remaining kit materials:
Disposal Checklist
| Item | How to Dispose |
| Swab wrapper | Household trash |
| Broken swab shaft | Trash unless marked recyclable |
| Instruction sheet | Recycle if clean and paper-based |
| Outer kit box | Recycle with cardboard or paper |
| Plastic mailer | Recycle if accepted locally |
| Unused items | Trash or follow local hazardous waste guidelines |
| Gloves (if provided) |
Trash bin |
Do not flush any part of the kit. Even small plastic parts can clog pipes and pollute waterways.
6. Unused, Expired, or Damaged Kits
If you have a test kit that is damaged, past its expiration date, or unused and no longer needed:
- Contact your test provider or pharmacy. They may offer return or safe disposal instructions
- Do not use expired swabs, transport tubes, or reagents
- Never flush unused materials
- If no return option is provided, dispose of unused swabs and packaging in the trash, following the same guidance above for separating recyclables
Troubleshooting & Mistakes
First: You’re Probably Doing It Right
It’s very unlikely you’ll do anything wrong—and even if you do make a mistake, you’re not alone. Vaginal swab self-tests are designed to be simple and safe, even for first-timers. Mistakes are common, totally normal, and usually easy to fix.
Most issues fall into one of two categories:
- Minor errors you can proceed with
- Major errors that require repeating the test
What Kind of Mistake Did You Make?
Here’s how to respond based on what happened:
| Issue | What to Do | Repeat Test? | Contact Provider? |
| Touched swab tip before collecting | Discard and use a new swab | ✔️ Required | ✔️ Yes |
| Touched swab tip after collection | Proceed with sample | ❌ Not required | ❓ Optional |
| Dropped swab (before or after use) | Discard and use a new swab | ✔️ Required | ✔️ Yes |
| Unsure about insertion depth | Continue if other steps followed | ❌ Optional | ❓ Optional |
| Didn’t rotate long enough | Proceed if swab was inserted properly | ❌ Optional | ❓ Optional |
| Broke swab shaft incorrectly | If it won’t fit in the tube, call for help | ❓ Maybe | ✔️ Yes |
| Forgot paperwork | Lab may contact you; resubmit if asked | ❌ Not required | ❓ Optional |
| Sample exposed to extreme heat/cold | Call your provider/test company | ❓ Maybe | ✔️ Yes |
| Swab tube contents spilled on skin | Wash area with soap and water | ❌ Not required | ✔️ Yes if irritation |
| Swab tube splashed in eyes | Flush with water immediately | ❌ Not required | ✔️ Yes immediately |
| Vaginal irritation after swabbing | Monitor and contact provider if it worsens | ❓ Maybe | ✔️ Yes |
If you’re ever unsure what to do after a potential mistake, always check your test kit instructions or reach out to your healthcare provider. You don’t have to figure it out alone.
What Needs a Redo vs. What Doesn’t
Repeat the test if:
- You touched or dropped the swab before collecting your sample
- You forgot to seal the swab in the transport tube
- The swab shaft broke and the tip can’t be secured inside11
- The test kit is expired or damaged
- The sample was left out for longer than recommended in extreme temperatures
You can usually continue if:
- You touched the swab tip after collecting the sample
- You’re unsure if you inserted the swab deep enough
- You’re not sure how long you rotated it (but did your best)
- You didn’t see discharge (cell contact is still valid)
- You forgot paperwork—the lab will follow up
What If I Can’t Get a Replacement Kit Right Away?
If you’re in a remote location, traveling, or face shipping delays, contact your test provider or doctor's office. They may be able to help expedite the kit or give you local testing options.
Some providers also offer in-clinic pickup or courier drop-off for vaginal swab tests.
Even if you are pressed for time, never use a damaged or expired kit. Wait until you can purchase a new kit or ask your provider to take a swab at the office.it for a fresh one or ask your provider to swab you in person.
Getting and Understanding Your Test Result
Test results for a vaginal swab usually arrive within 1-7 business days, depending on whether you did the test at an office or mailed it to a lab.
Depending on what you were testing for, your results will show of you have an STI, an overgrowth of yeast or other disruptive bacteria, or the depletion of beneficial Lactobacillus strains1213.
Even if you used a home kit, it's a good idea to review your results with your care provider. They will help you make sense of what's written there while also helping to put it in the context of your individual health history.
If your test results show you are HPV-positive, it's especially important to check in with your provider, as some HPV-positive results require a follow-up exam to look for cervical cell changes. In those cases, a cervical swab or colposcopy may be necessary to get a clearer picture1415.
Long story short, though home tests can be convenient, a doctor can help you feel informed and supported.
What Happens If Your Test Is Invalid?
Sometimes, instead of a positive or negative result, you might get a report that says your test was “invalid” or “inconclusive.” It sounds alarming, but it doesn’t necessarily mean anything is wrong with you. It just means the lab wasn’t able to process your sample.
Common Causes of Invalid Results
- The swab tip was contaminated (touched or dropped)
- The sample didn’t include enough vaginal cells or fluid
- The transport tube wasn’t sealed correctly
- The sample was exposed to extreme temperatures during storage or mailing17
- The test was performed after the expiration date on the kit
- Required paperwork was missing, delaying or preventing processing
What to Do Next
If your test result is marked invalid:
- Don’t panic. This happens more often than you’d think, especially with first-time self-collect kits.
- Look for a message from the lab or your provider. Most labs will notify you and offer a free replacement kit or ask you to come in for a follow-up.
- Repeat the test as soon as you can, following the collection, storage, and mailing instructions closely.
- Reach out to your care provider if you’re unsure about how to proceed. They can offer guidance or perform the swab for you if needed.
Think of an invalid result as a “try again” rather than a warning sign. It’s just the lab’s way of saying, “We couldn’t get a clear enough look. Can you send another sample?”
Post-Test Support for Your Vaginal Microbiome

If your vaginal swab showed signs of imbalance and especially if it showed an active infection like BV or a vaginal yeast infection, you will want to discuss how you can support your microbiome to restore your vaginal health and prevent future symptoms.
Here are some simple things you can do that will make a big difference in your overall vaginal wellness:
Take all prescribed medications
If your provider recommends antibiotics or antifungals, finish the full course—even if symptoms improve18.
Stick with gentle hygiene
Skip the scented soaps and douches. Rinse with water or a pH-friendly wash—nothing more is needed.
Wear breathable underwear
Cotton underwear is best. Avoid staying in damp clothes (like after a workout).
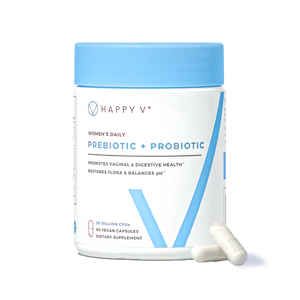
Consider daily probiotics
Since Lactobacillus is a probiotic, taking daily probiotics that contain proven Lactobacillus strains can help restore your levels. Happy V's Prebiotic + Probiotic is doctor-formulated and contains only clinically proven strains of Lactobacillus, like L. crispatus and L. rhamnosus.
It also includes prebiotics and a delayed-release capsule, both of which help ensure those proven probiotics actually survive your stomach and can populate your microbiomes, supporting overall balance.
Final Thoughts
Doing a vaginal swab, whether at home or with a provider, might feel a little intimidating at first, but ultimately, it's a simple, effective way to gauge your vaginal health. With a clear, clean swab test, you will have the insights you need to make informed decisions about your health.
Even if you take your swab at home, remember to share your results with your doctor, so they can help you take the right next step toward your health goals.
Keep the Conversation Going
- Visit our blog for more women’s health tips.
- Join our private Happy V Facebook group to hear from others who’ve been there.
- Explore supplements designed to support your vaginal health journey.
Disclaimer: This blog is for informational and educational purposes only and is not intended to diagnose, treat, cure, or prevent any disease. Statements about supplements have not been evaluated by the Food and Drug Administration. For more information about vaginal infections, visit the CDC or speak to a licensed healthcare provider.